↓ Jump to: Record videos using Tegrity | Setting publishing options | Share recording
Whether inside the classroom or out, Tegrity makes recording your lectures or supplementary course content a snap. Click a button to start recording*, click again to pause or stop, and Tegrity takes care of the rest. Recordings are automatically uploaded to the right course for only enrolled students to view.
Source: Tegrity.com
Record videos using Tegrity
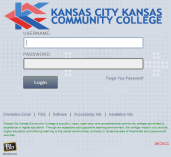
On your web browser, go to www.kckcc.edu, and click on Online Classes located at the top portion of the website. Or you can also directly go to KCKCC’s Blackboard page by typing https://myclass.kckcc.edu
After logging in, you will see a list of courses in the My Courses module of KCKCC’s Blackboard home page. Click on the course you want to create a Tegrity recording for. In the course shell, you fill find the course menu column on the left side of the page.

From this column, locate the link titled Tegrity Classes, and click it to launch Tegrity.
When Tegrity launches in a new browser window, you will see the Tegrity interface. From here, you will see a list of recordings you previously created, and the options for starting a test or starting a recording. Click on Start a Recording.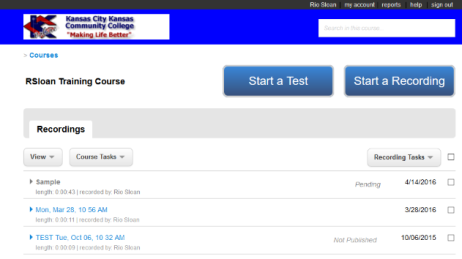
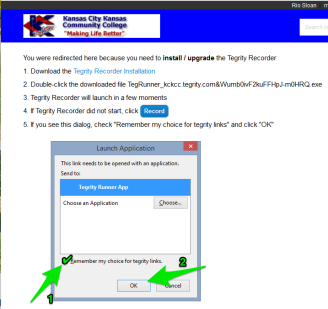
When you click on Start Recording, you will see a Launch Application window. From this step, you can either install the Tegrity application, or launch it if you already have it installed in your computer.
 Install
If you don’t have Tegrity in your computer yet, there would be an option for you to install it. You need to install the application in your computer to be able to record videos. Tegrity will show additional directions for installing the application on the browser window. Refer to the image on the right side of this step. The application file would have downloaded in your Downloads folder in your computer. Double-click on the .exe file to install the application.
Launch Application
When you have the Tegrity application installed on your computer, select Tegrity Runner App from the Launch Application window and click OK.
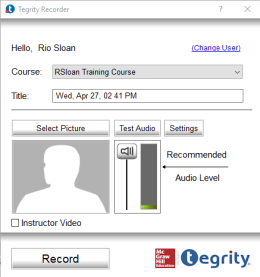 After launching the Tegrity, the Tegrity Recorder should now be open in your computer. From here, you can:
- Change the course where the Tegrity recording will be published in
- Change the title for the recording
- Select a picture, or choose to have the Instructor Video With instructor video visible, you will be recording with the webcam installed in your computer.
- Test audio and change other settings.
- Click Record to start recording.
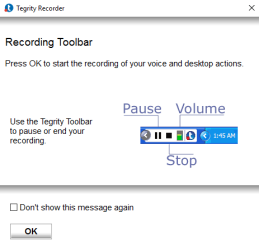
When you click on Record, a window may pop-up to notify you of the Tegrity Recording Toolbar. The Toolbar will be available to you in the desktop task bar at the bottom of your screen. From the toolbar, you can pause or stop the recording, and view the audio level while recording. Checking the box for Don’t show this message again will stop this pop-up window from reminding you of the toolbar in future recording sessions.
Clicking OK will minimize this window, and your recording will start. There’s no preview option while recording. You can only preview the recording after the recording is done.
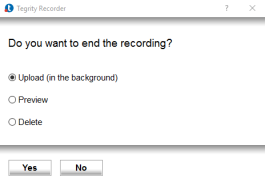 When you’re done recording, click on the Stop button in the Tegrity Recording Toolbar found in your desktop task bar. After clicking Stop, a window will pop up, asking if you want to end the recording. From this window, you have the option to:
- Upload the video without reviewing.
- Preview the recording before you upload it.
- Delete the recording and start over.
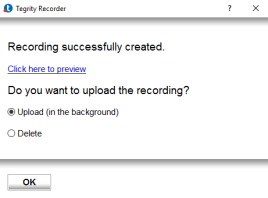 When you preview the recording, it will provide you a link to click to view the recording. When you’re done previewing it, return to this window and either select Upload, or Delete.
When you upload the recording, it will be listed in the Recordings page for that course in Tegrity. Click on the name of the recoding to view a thumbnail preview of that video. Clicking on the thumbnail will open and play the recording. Recordings in this list is viewable by the students.
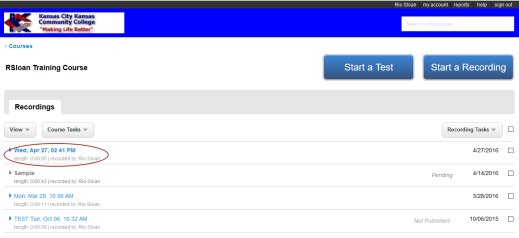
To delete a video recording, simply select the checkbox for that video, go to Recording Tasks, and select Delete.
Setting publishing options
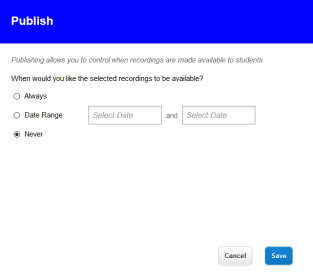 You can choose to set the publishing option of a recording as:
- Always available to students
- Available only within a date range
- Never available to students (Private)
To do this:
- Select the checkbox for the recording you want to edit the publishing options for.
- Click on the Recording Tasks drop down button.
- Select Publish.
- The Publish window will open. Select the publish option you want the recording set to.
Share your Tegrity recording
You can choose to share your recording (whether available or private) with your students.
 To do this:
- Select the checkbox for the recording you want to edit the share the recording link.
- Click on the Recording Tasks drop down button.
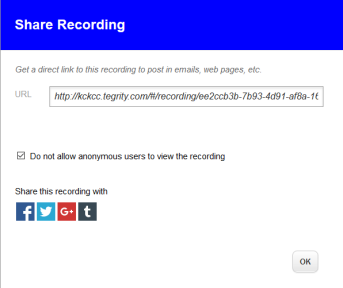
- Select Share Recording.
- The Share Recording window will open. The checkbox underneath toggles the option of allowing anonymous views of the recording. With this checked, the student will have to log in to view the video. Leaving it unchecked will let the student view the video without having to login to Tegrity.
- Copy and send the URL link to share the recording. If you have the checkbox for anonymous users not selected, you will see the embed code for the recording.
